03/11/2026 | 10 minute read
How to Make Google Forms Look Professional
Transform your Google Forms from basic to professional with design strategies, customization tips, and tools like BeeForm. Step-by-step guide to creating polished, branded forms.
Google Forms is free, easy to use, and integrates seamlessly with your Google Workspace. But let's be honest: the default purple header and basic styling scream 'template.' If you're using forms for business, events, or any professional context, you need them to look polished and match your brand.
In this guide, we'll walk through practical strategies to transform your Google Forms from basic to professional-looking, starting with native features and then exploring how specialized tools can take your forms to the next level.
- Why Professional Forms Matter
- Using Native Google Forms Features
- The Limitations of Basic Styling
- Advanced Solutions: Form Designer Tools
- The BeeForm Approach
- Key Features for Professional Forms
- Getting Started
- Best Practices
Why Professional Forms Matter
Your form is often the first interaction someone has with your business ororganization. A professionally designed form:
- Builds trust: Polished designs signal that you care about details and professionalism
- Increases completion rates: Clear, attractive forms are easier and more enjoyable to fill out
- Reinforces brand identity: Consistent colors, fonts, and logos create brand recognition
- Reduces abandonment: Professional forms feel more legitimate and secure
Whether you're collecting customer feedback, event registrations, job applications, or lead information, the visual presentation matters as much asthe questions themselves.
Using Native Google Forms Features
Before exploring third-party tools, let's maximize what Google Forms offers out of the box:
1. Choose a Better Theme Color
Click the palette icon in the top-right to select a theme color. Move away from the default purple to colors that match your brand. While limited, this simple change immediately makes your form look more intentional.
2. Add a Custom Header Image
Click 'Customize theme' → 'Choose image' to upload a header banner. Use ahigh-quality image (1600 x 400 pixels recommended) that represents your brandor topic. This adds visual interest and professional context.
3. Write Clear, Concise Questions
Professional presentation isn't just visual. Use:
- Short, specific question titles
- Help text for clarification when needed
- Logical question order and grouping
- Section breaks to organize long forms
4. Use Built-in Validation
Add response validation to text fields (email format, number ranges, lengthlimits). This prevents errors and shows attention to detail.
5. Customize Confirmation Message
Go to Settings → Presentation → Confirmation message. Replace the generic' Your response has been recorded' with something more specific: 'Thanks! We'll contact you within 24 hours.'
The Limitations of Basic Styling
While these native features help, they have significant limitations:
- Limited color control: You can only change the header accent color, not fonts, backgrounds, or input styles
- No logo placement: There's no native way to add your logoin a professional, consistent position
- Fixed layout: You're stuck with the standard vertical layout; no multi-step wizards or custom arrangements
- Basic inputs: Default checkboxes, radio buttons, and textfields can't be styled
- No custom domains: Your form URL is always a long GoogleForms link
If you need your forms to truly match your brand and stand out, you'll needmore advanced customization options.
Advanced Solutions: Form Designer Tools
Dedicated form designer tools bridge the gap between Google Forms' functionality (free, powerful backend) and the visual polish of premium form builders like Typeform or Jotform (expensive, but beautiful).
These tools typically allow you to:
- Customize colors, fonts, and backgrounds comprehensively
- Upload and position logos professionally
- Style individual form elements (inputs, buttons, cards)
- Create multi-step wizard forms with progress indicators
- Add response limits and custom closing messages
- Use professional templates as starting points
The beauty of these solutions? You keep all the benefits of Google Forms(free, reliable, familiar response management) while getting a premium visualexperience.
The BeeForm Approach
BeeForm is one such tool designed specifically to make GoogleForms look professional without requiring any coding knowledge. It works as aGoogle Forms add-on, transforming your standard form into a beautifullydesigned web page.
The BeeForm designer provides a live preview alongside intuitivecustomization controls.
What Makes BeeForm Different?
Visual, Real-Time Editor: Unlike tools that require you topreview in another window, BeeForm shows you exactly how your form will lookas you make changes—no guesswork.
Professional Templates: Start with pre-designed themes forcorporate, events, education, creative projects, and more. Apply a themeinstantly and customize from there.
Choose from a library of professionally designed themes to instantly elevate your form's appearance.
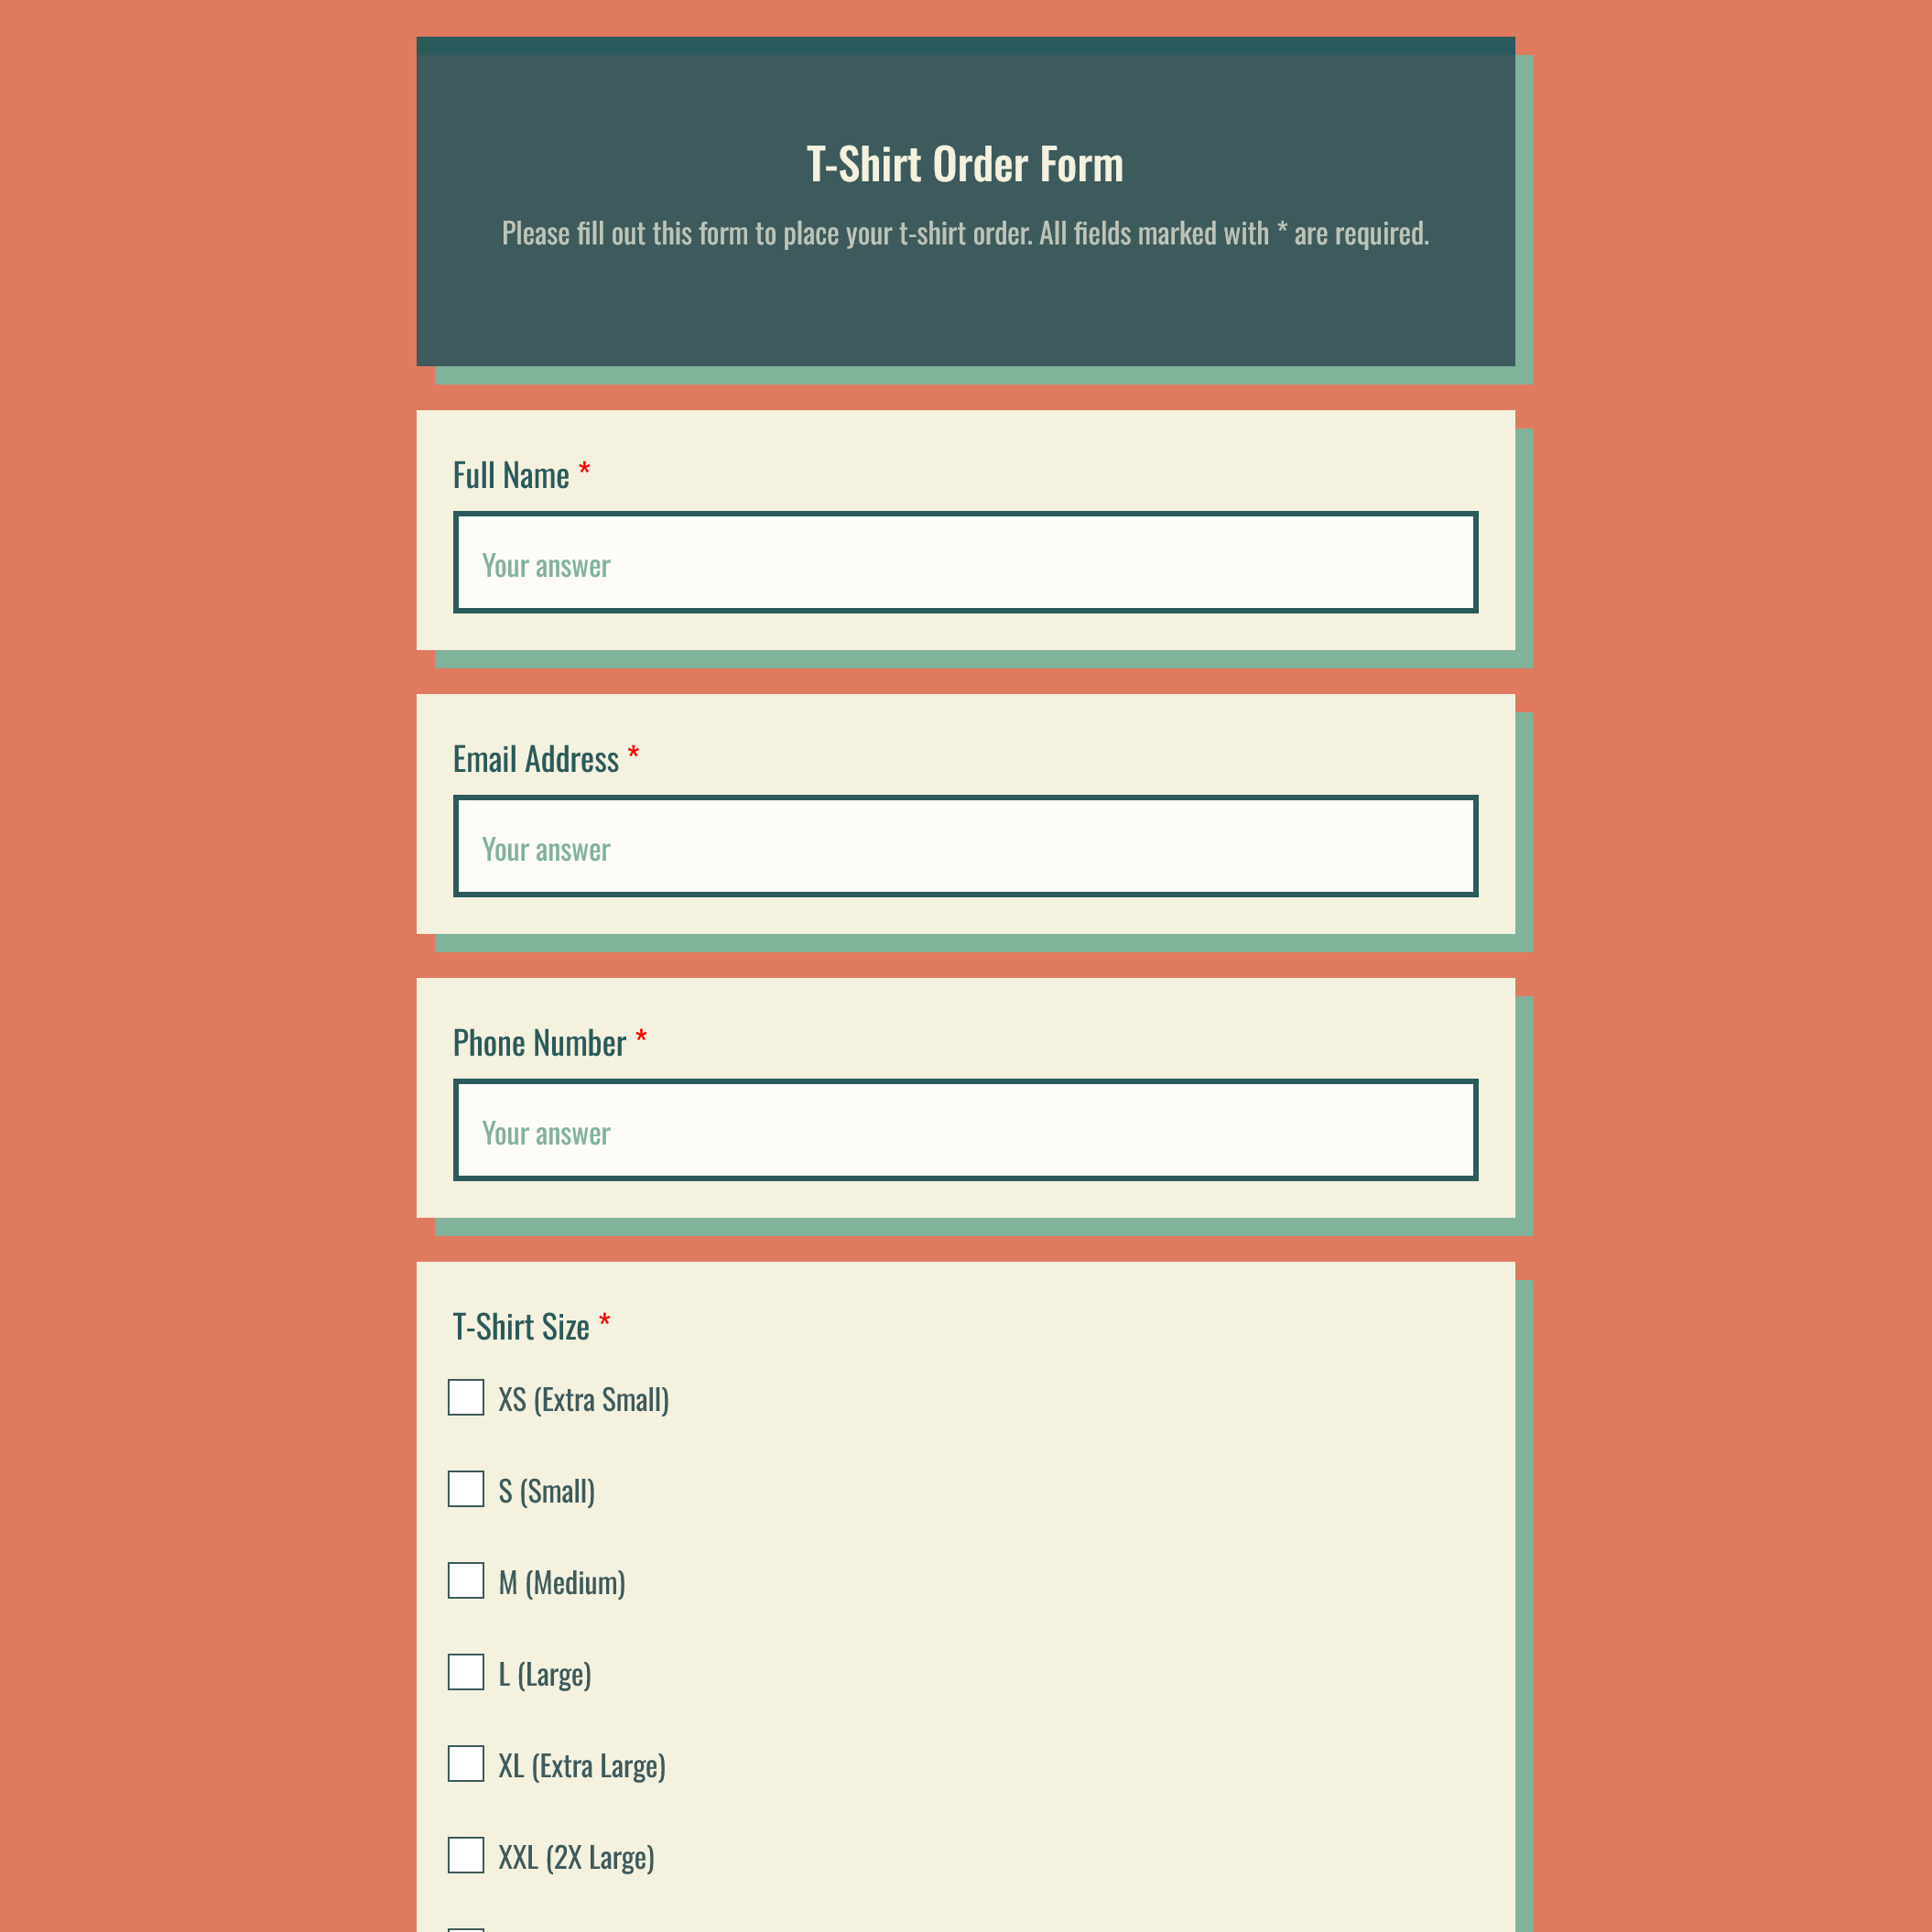
Example of a BeeForm-styled template — a branded t-shirt order form ready to use out of the box.
Granular Control: Customize everything—header colors, logo placement, container styling, font families, input styles, button designs, and more. Each setting is organized logically in the settings panel.
No Coding Required: Everything is point-and-click with color pickers, dropdowns, and sliders. If you can use Google Forms, you can use BeeForm.
Key Features for Professional Forms
Here are specific features that transform a basic form into a profession alone:
🎨 Complete Brand Identity
Upload your logo, set brand colors as primary accents, choose matching fonts from Google Fonts, and add custom background images or colors. Every align with your visual identity.
🧙 Wizard Mode (Multi-Step Forms)
Present one question at a time with automatic navigation buttons and aprogress bar. This reduces cognitive load and works especially well for:
- Long surveys (10+ questions)
- Complex applications or registrations
- Forms on mobile devices
Wizard mode presents one question at a time, improving focus and mobile experience.
🎛️ Custom Input Styling
Tailor how each input type appears:
- Text fields: Change background colors, border styles, textsize
- Multiple choice: Choose circle, square, or rounded shapes; customize active/inactive colors
- Rating scales: Use stars, hearts, squares, or circles with custom colors
🔘 Professional Buttons
Customize Submit, Next, Back, and Skip buttons with your brand colors, rounded corners, and custom text labels. Small details like button styling significantly impact perceived professionalism.
🛑 Response Management
Advanced forms need advanced management:
- Response limits: Automatically close your form after a set number of submissions (perfect for limited-capacity events)
- Custom closed messages: Display helpful information when someone tries to access a closed form
- Email notifications: Get notified immediately or in batche swhen new responses arrive
📋 Custom Confirmation Pages
Replace the generic 'Your response has been recorded' with a beautifully styled confirmation page. Add next steps, contact information, social links, or a simple thank you message that matches your form's design.
Getting Started
The process of creating a professional form is straightforward:
- Create your Google Form: Start with Google Forms as usual,adding all your questions, validation rules, and sections
- Install a form designer tool: Add BeeForm (or a similartool) from the Google Workspace Marketplace
- Open the designer: Launch the visual editor from theadd-ons menu
- Choose a template (optional): Start with a pre-designedtheme for instant polish
- Customize your design: Adjust colors, fonts, logos,layouts, and input styles to match your brand
- Configure settings: Set up response limits, notifications, and custom messages
- Preview and publish: Test your form, then share the customlink
Preview your form exactly as respondents will see it before publishing.
All responses submitted through your custom-designed form still go to your Google Form's response sheet—you keep the familiar backend while presenting a premium frontend.
Best Practices
Regardless of which tools you use, follow these principles for professional forms:
✓ Keep Your Brand Consistent
Use the same colors, fonts, and logo placement across all your forms and marketing materials. Consistency builds recognition and trust.
✓ Prioritize Readability
Don't sacrifice legibility for style. Ensure sufficient contrast between text and backgrounds, use readable font sizes (minimum 14px for body text), and provide adequate spacing.
✓ Test on Mobile Devices
Many respondents will complete your form on phones or tablets. Preview your form on different screen sizes and consider using wizard mode for better mobile experiences.
✓ Simplify When Possible
Professional doesn't mean complicated. Often, clean and minimal designs appear more professional than heavily decorated ones. Use white space effectively.
✓ Include Clear Calls-to-Action
Make your submit button prominent with strong contrast and clear text ('Submit Registration,' not just 'Submit'). Guide users through the process.
✓ Provide Context
Use your form's header or description to explain why you're collecting information and how it will be used. Transparency reduces abandonment.
✓ Thank Respondents Properly
A well-designed confirmation page shows appreciation and provides next steps.It's your last impression—make it count.
Conclusion
Making Google Forms look professional doesn't require abandoning the platform or subscribing to expensive alternatives. By maximizing native features where possible and using specialized design tools like BeeForm for advanced customization, you can create forms that are both functionally powerful and visually impressive.
Remember: your form is often the first impression someone has of your organization. A professional-looking form signals that you care about details, value the respondent's time, and run a trustworthy operation. Whether you're collecting event registrations, customer feedback, or job applications, the investment in form design pays dividends in completion rates and brand perception.
'Design is not just what it looks like and feels like. Design is how it works.' — Steve Jobs
Start with your next Google Form: apply these principles, explore design tools, and watch your response rates improve alongside your professional image. Once your form is live, use Massy Mail to send personalized invitations to your audience directly from Gmail—keeping your outreach as polished as your form.
Ready to put these principles into practice? Our guide on how to make a personality quiz on Google Forms walks through a real-world example that brings design and functionality together.