How to close a Google Form
Learn how to close a Google Form and stop accepting responses in a few simple steps. This guide covers how to turn off the accepting responses toggle, add a custom closed message, confirm your form is closed, and reopen it when needed. Also covers how to close a Google Form automatically using Termi — set a response limit, schedule a closing date and time, eliminate full choice options, and get email alerts when your form closes.
5 min read
Updated 3/12/2026
Video Guide
- Open Google Forms
- Open Your Form
- Go to the Responses Tab
- Turn Off "Accepting Responses"
- Add a Custom Closed Message
- Confirm the Form Is Closed
- How to Reopen the Form
- Close Automatically with Termi
Open Google Forms
Open your internet browser and navigate to forms.google.com . If you are not already signed into your Google account, sign in now. You will be taken to your Google Forms dashboard where all your existing forms are listed.
Open Your Form
From your Google Forms dashboard, click on the form you want to close. This will open the form editor. It does not matter whether the form is a quiz, a survey, a registration form, or any other type. The steps to stop accepting responses are the same for all Google Forms.
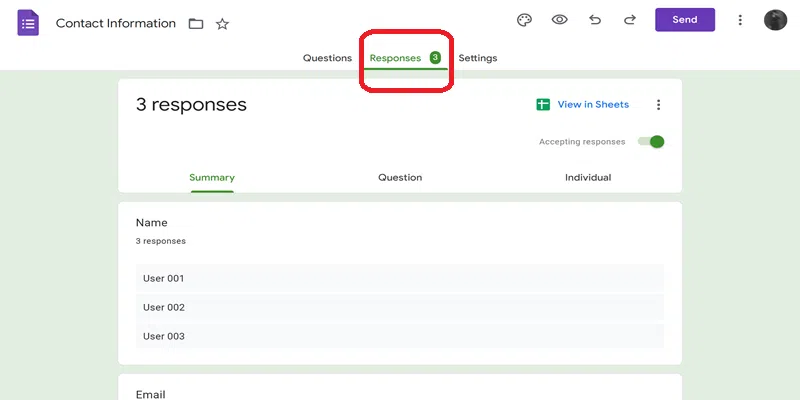
Go to the Responses Tab
Inside the form editor, you will see three tabs at the top: Questions , Responses , and Settings . Click on the Responses tab. This is where Google Forms lets you manage everything related to form submissions, including whether the form is currently accepting new responses.
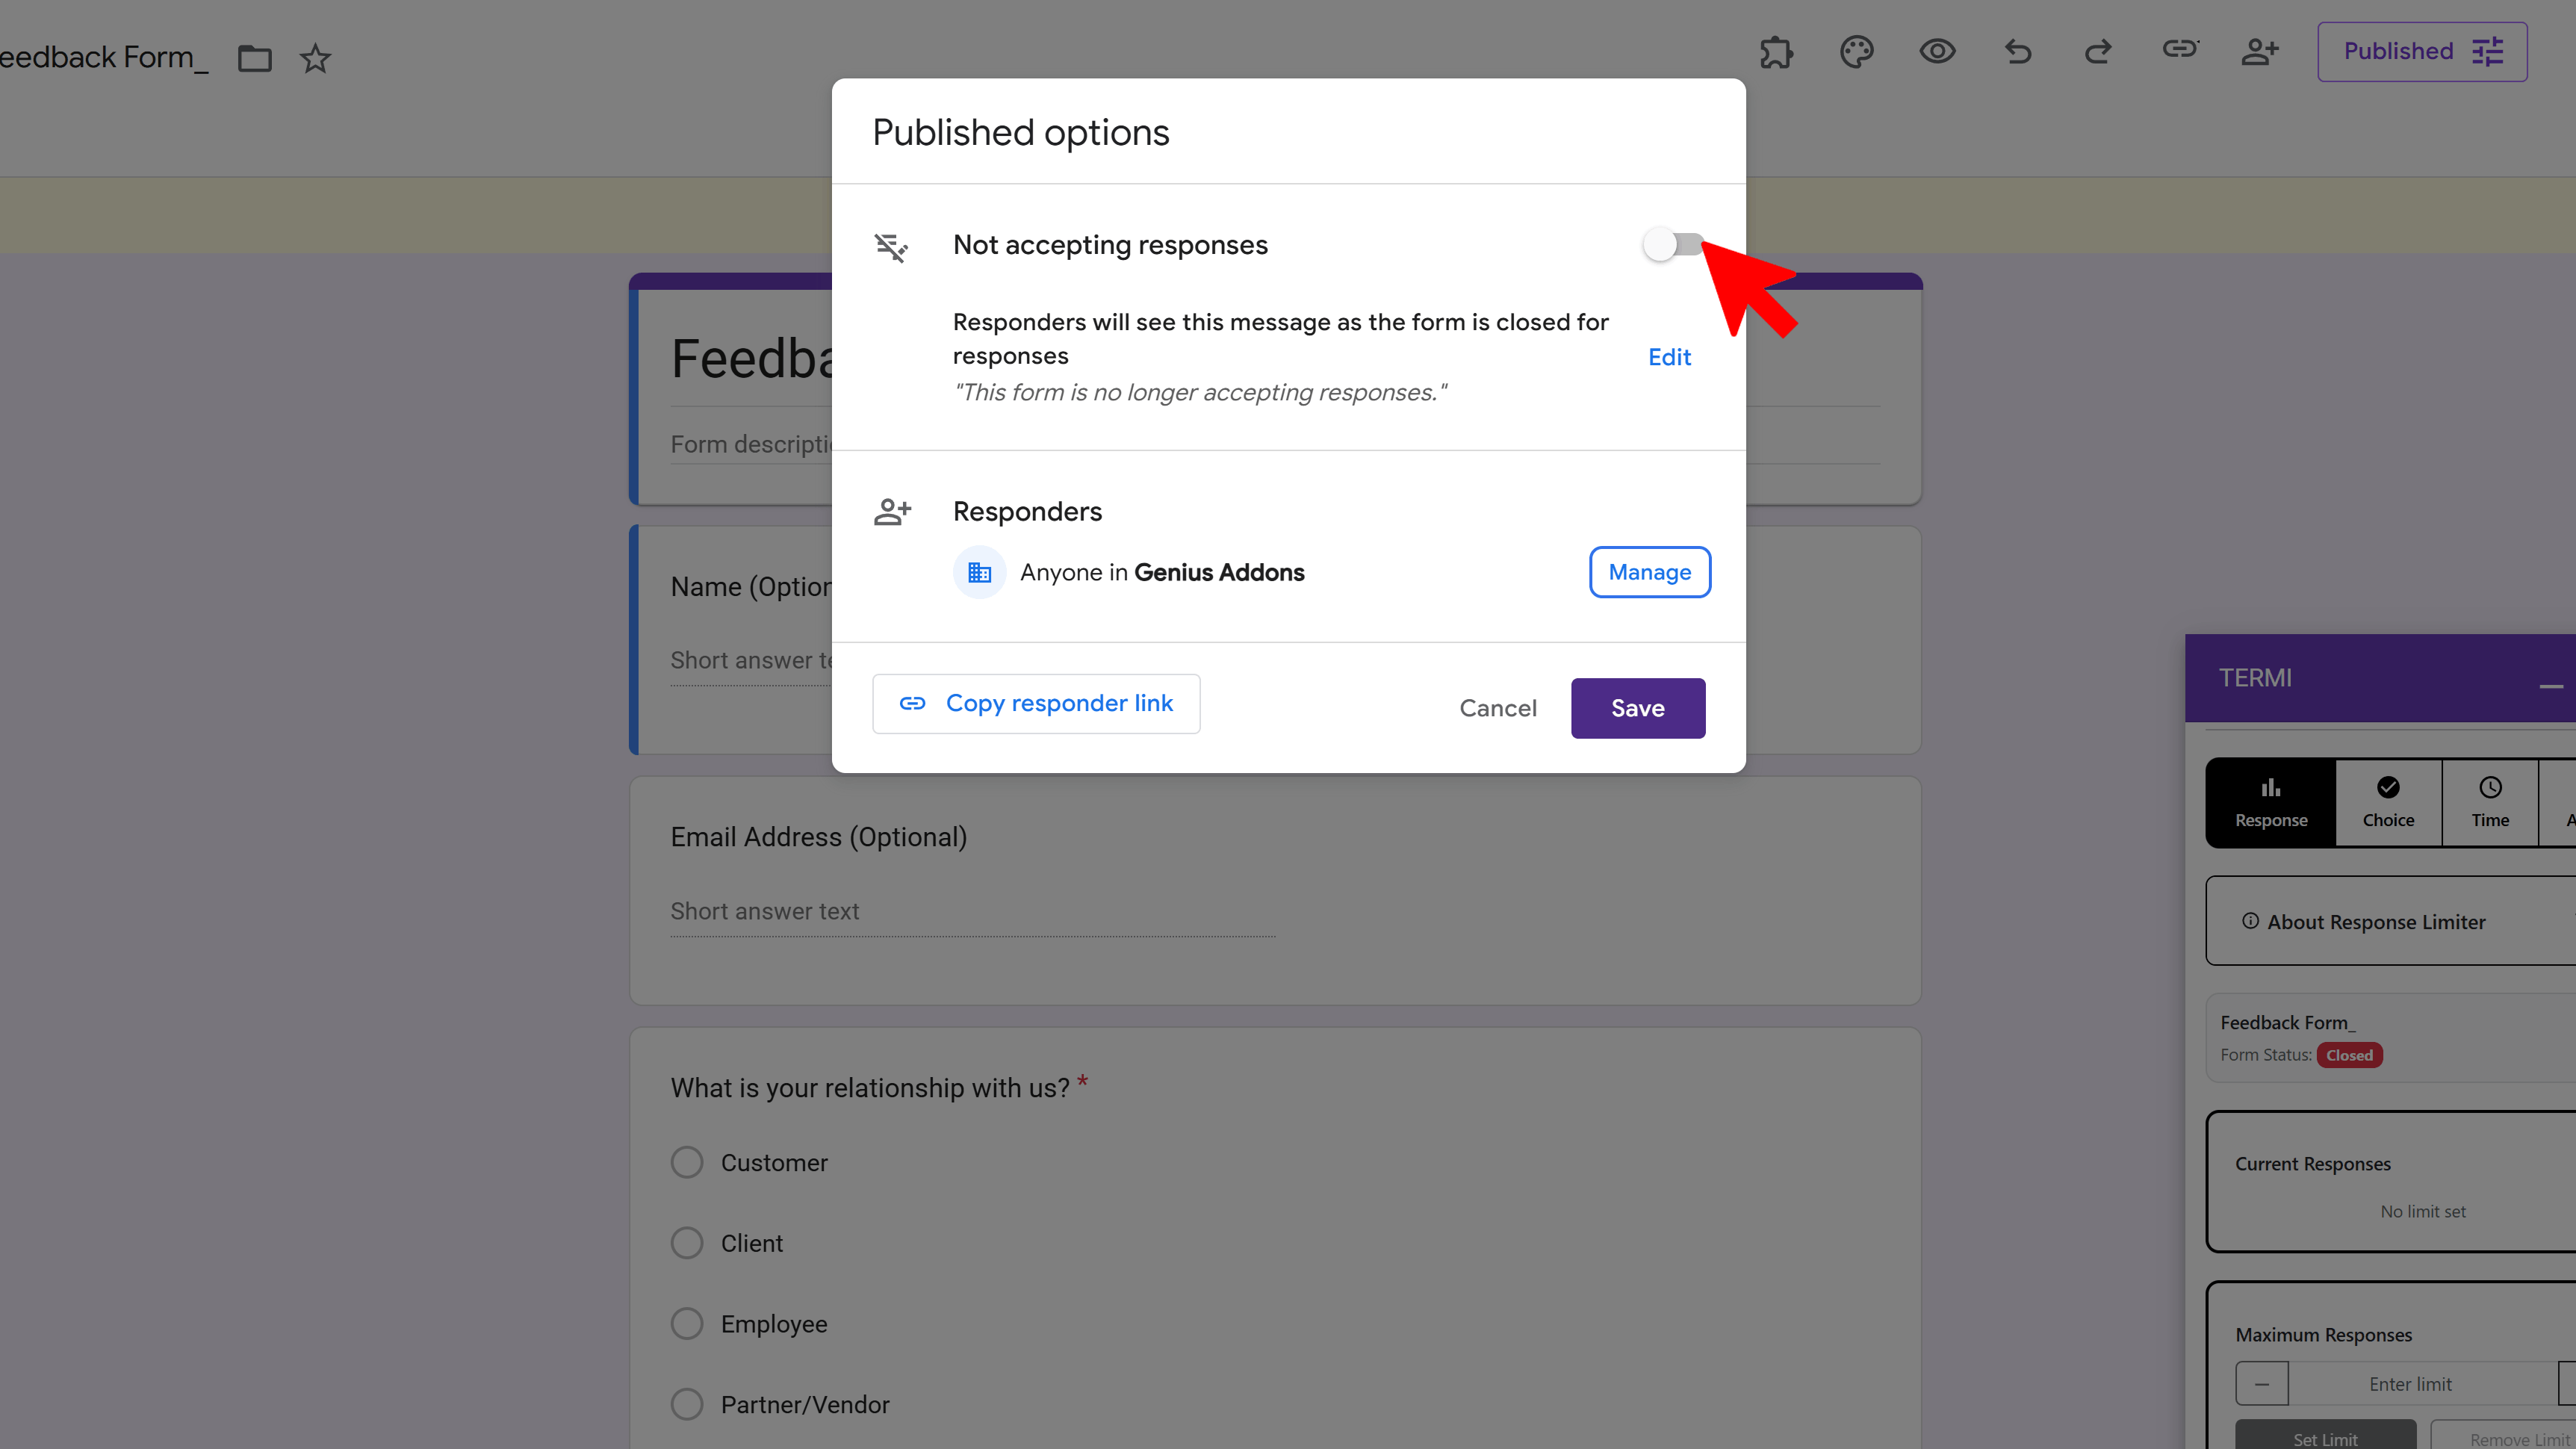
Turn Off "Accepting Responses"
At the top of the Responses tab, you will see a toggle labelled "Accepting responses" , which will be green and switched on by default. Click the toggle to switch it off. It will turn grey, and the form will immediately stop accepting new responses. Anyone who tries to open your form link after this point will see a message that the form is no longer accepting responses.
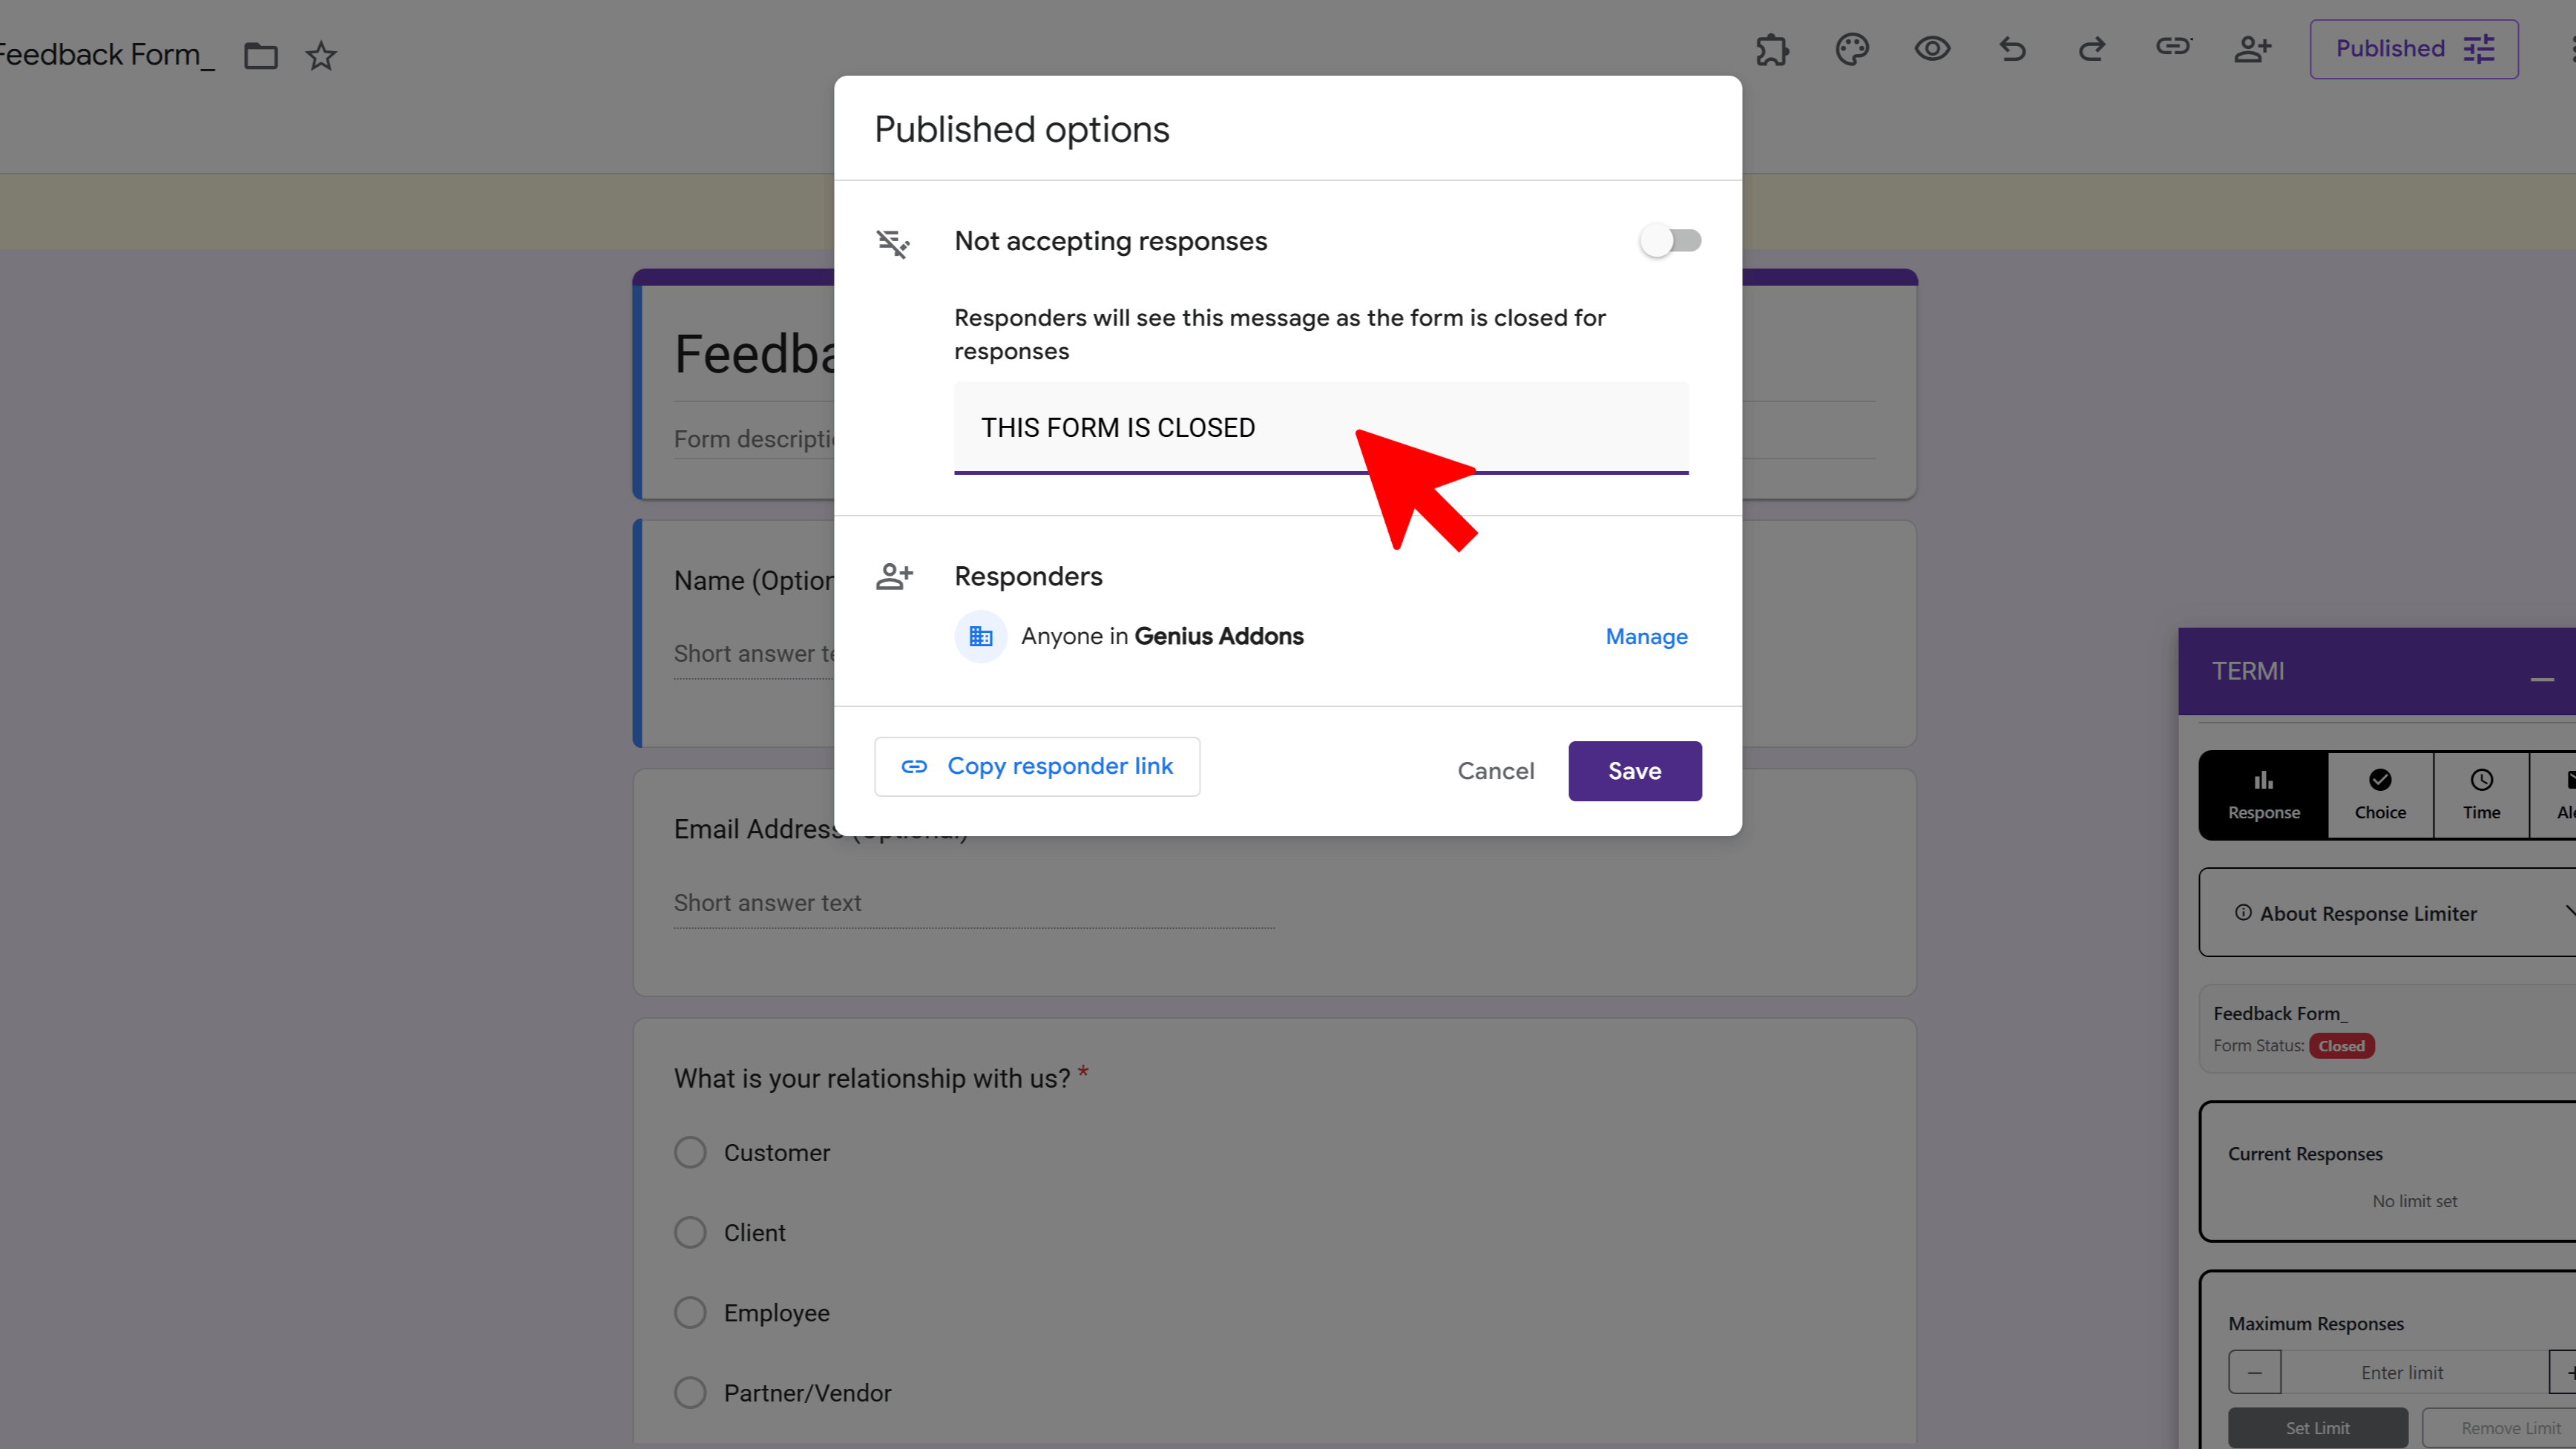
Add a Custom Closed Message
Once you turn off the toggle, a text box will appear below it labelled "Message for respondents" . This is the message people will see when they try to access your closed form. By default it says "This form is no longer accepting responses." You can customise this message to be more informative, for example: "Registration is now closed. Thank you for your interest!" or "This survey has ended. Results will be published shortly." Click anywhere outside the box to save your message.
Confirm the Form Is Closed
To verify your form is closed, copy the form's shareable link and open it in a new browser tab or incognito window. You should see your custom closed message instead of the form questions. This confirms that the form is no longer accepting responses and that respondents will not be able to submit any new answers.
How to Reopen the Form
If you need to start accepting responses again, simply go back to the Responses tab and click the toggle again to switch it back on. The form will immediately resume accepting submissions. This is useful if you closed a form temporarily (for example during a registration window pause) and want to turn it back on later. You can also reopen a form that was closed automatically by Termi: just disable or adjust the response limit inside the Termi sidebar and the form will start accepting responses again straight away.
Close Your Google Form Automatically with Termi
The manual method above works well for a one-off close, but it requires you to remember to do it yourself. If you need your form to stop accepting responses automatically (after a set number of responses, at a specific date and time, or when individual choice options fill up), you need Termi .
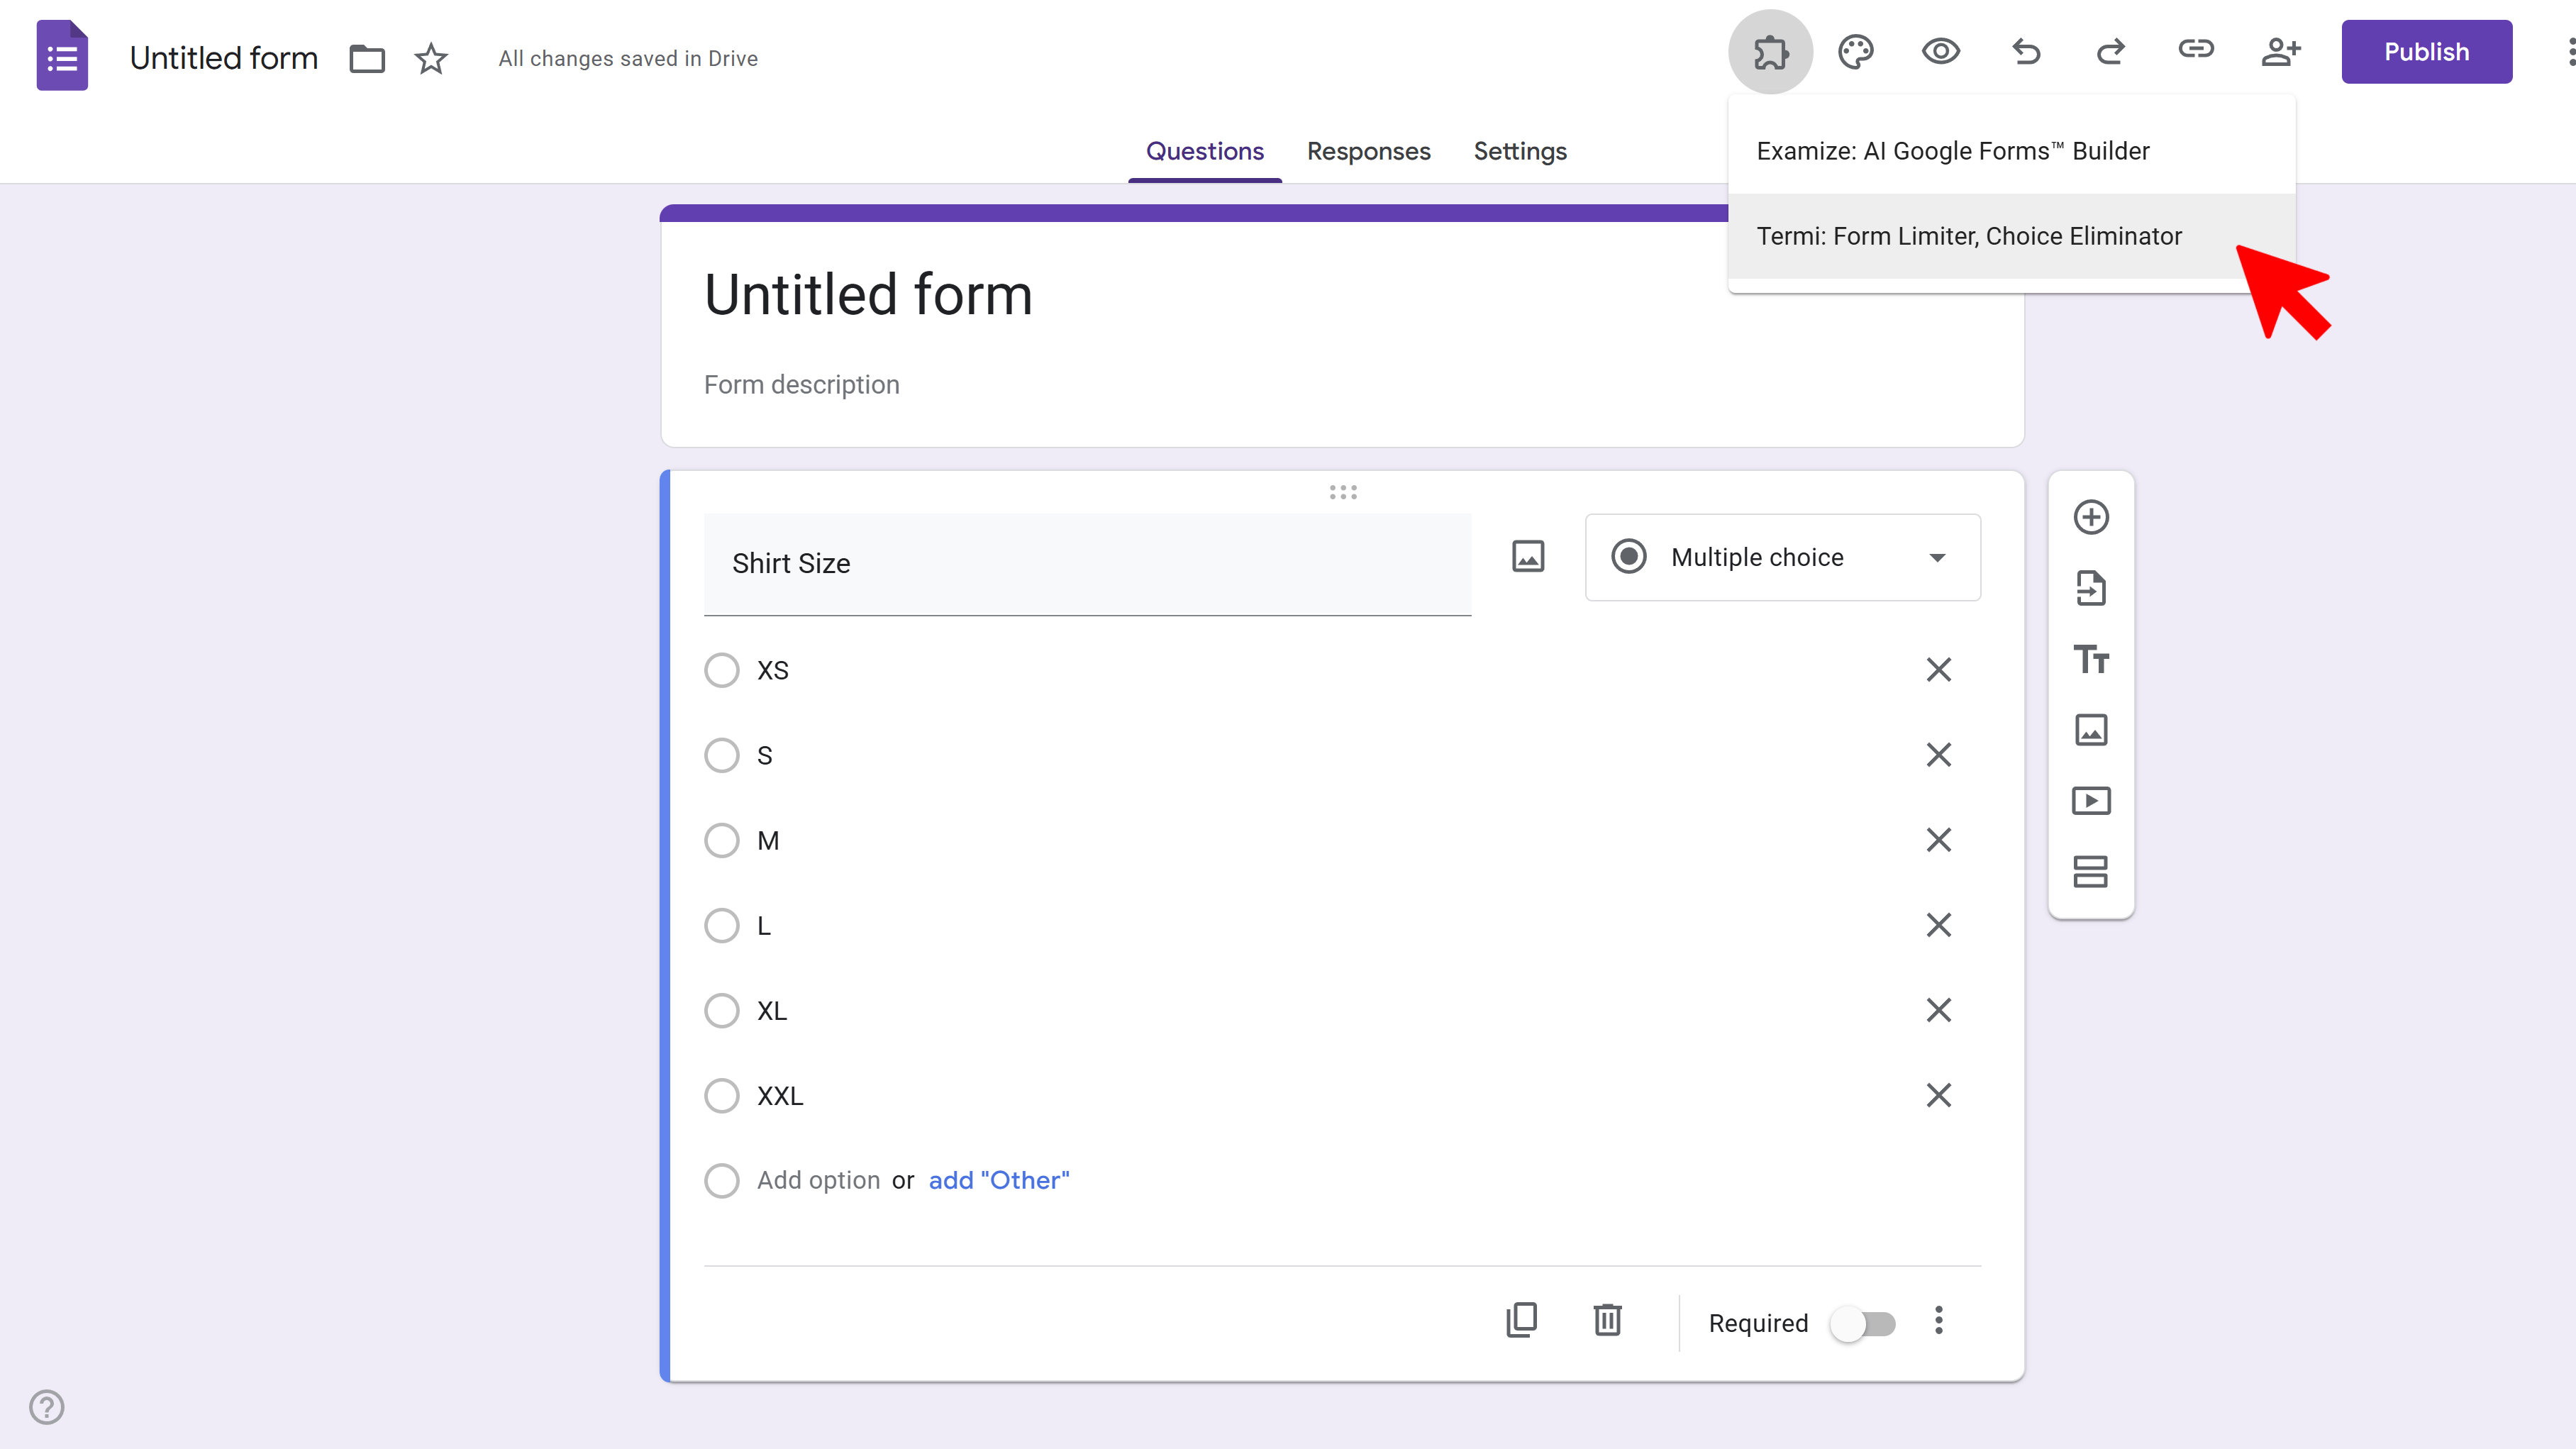
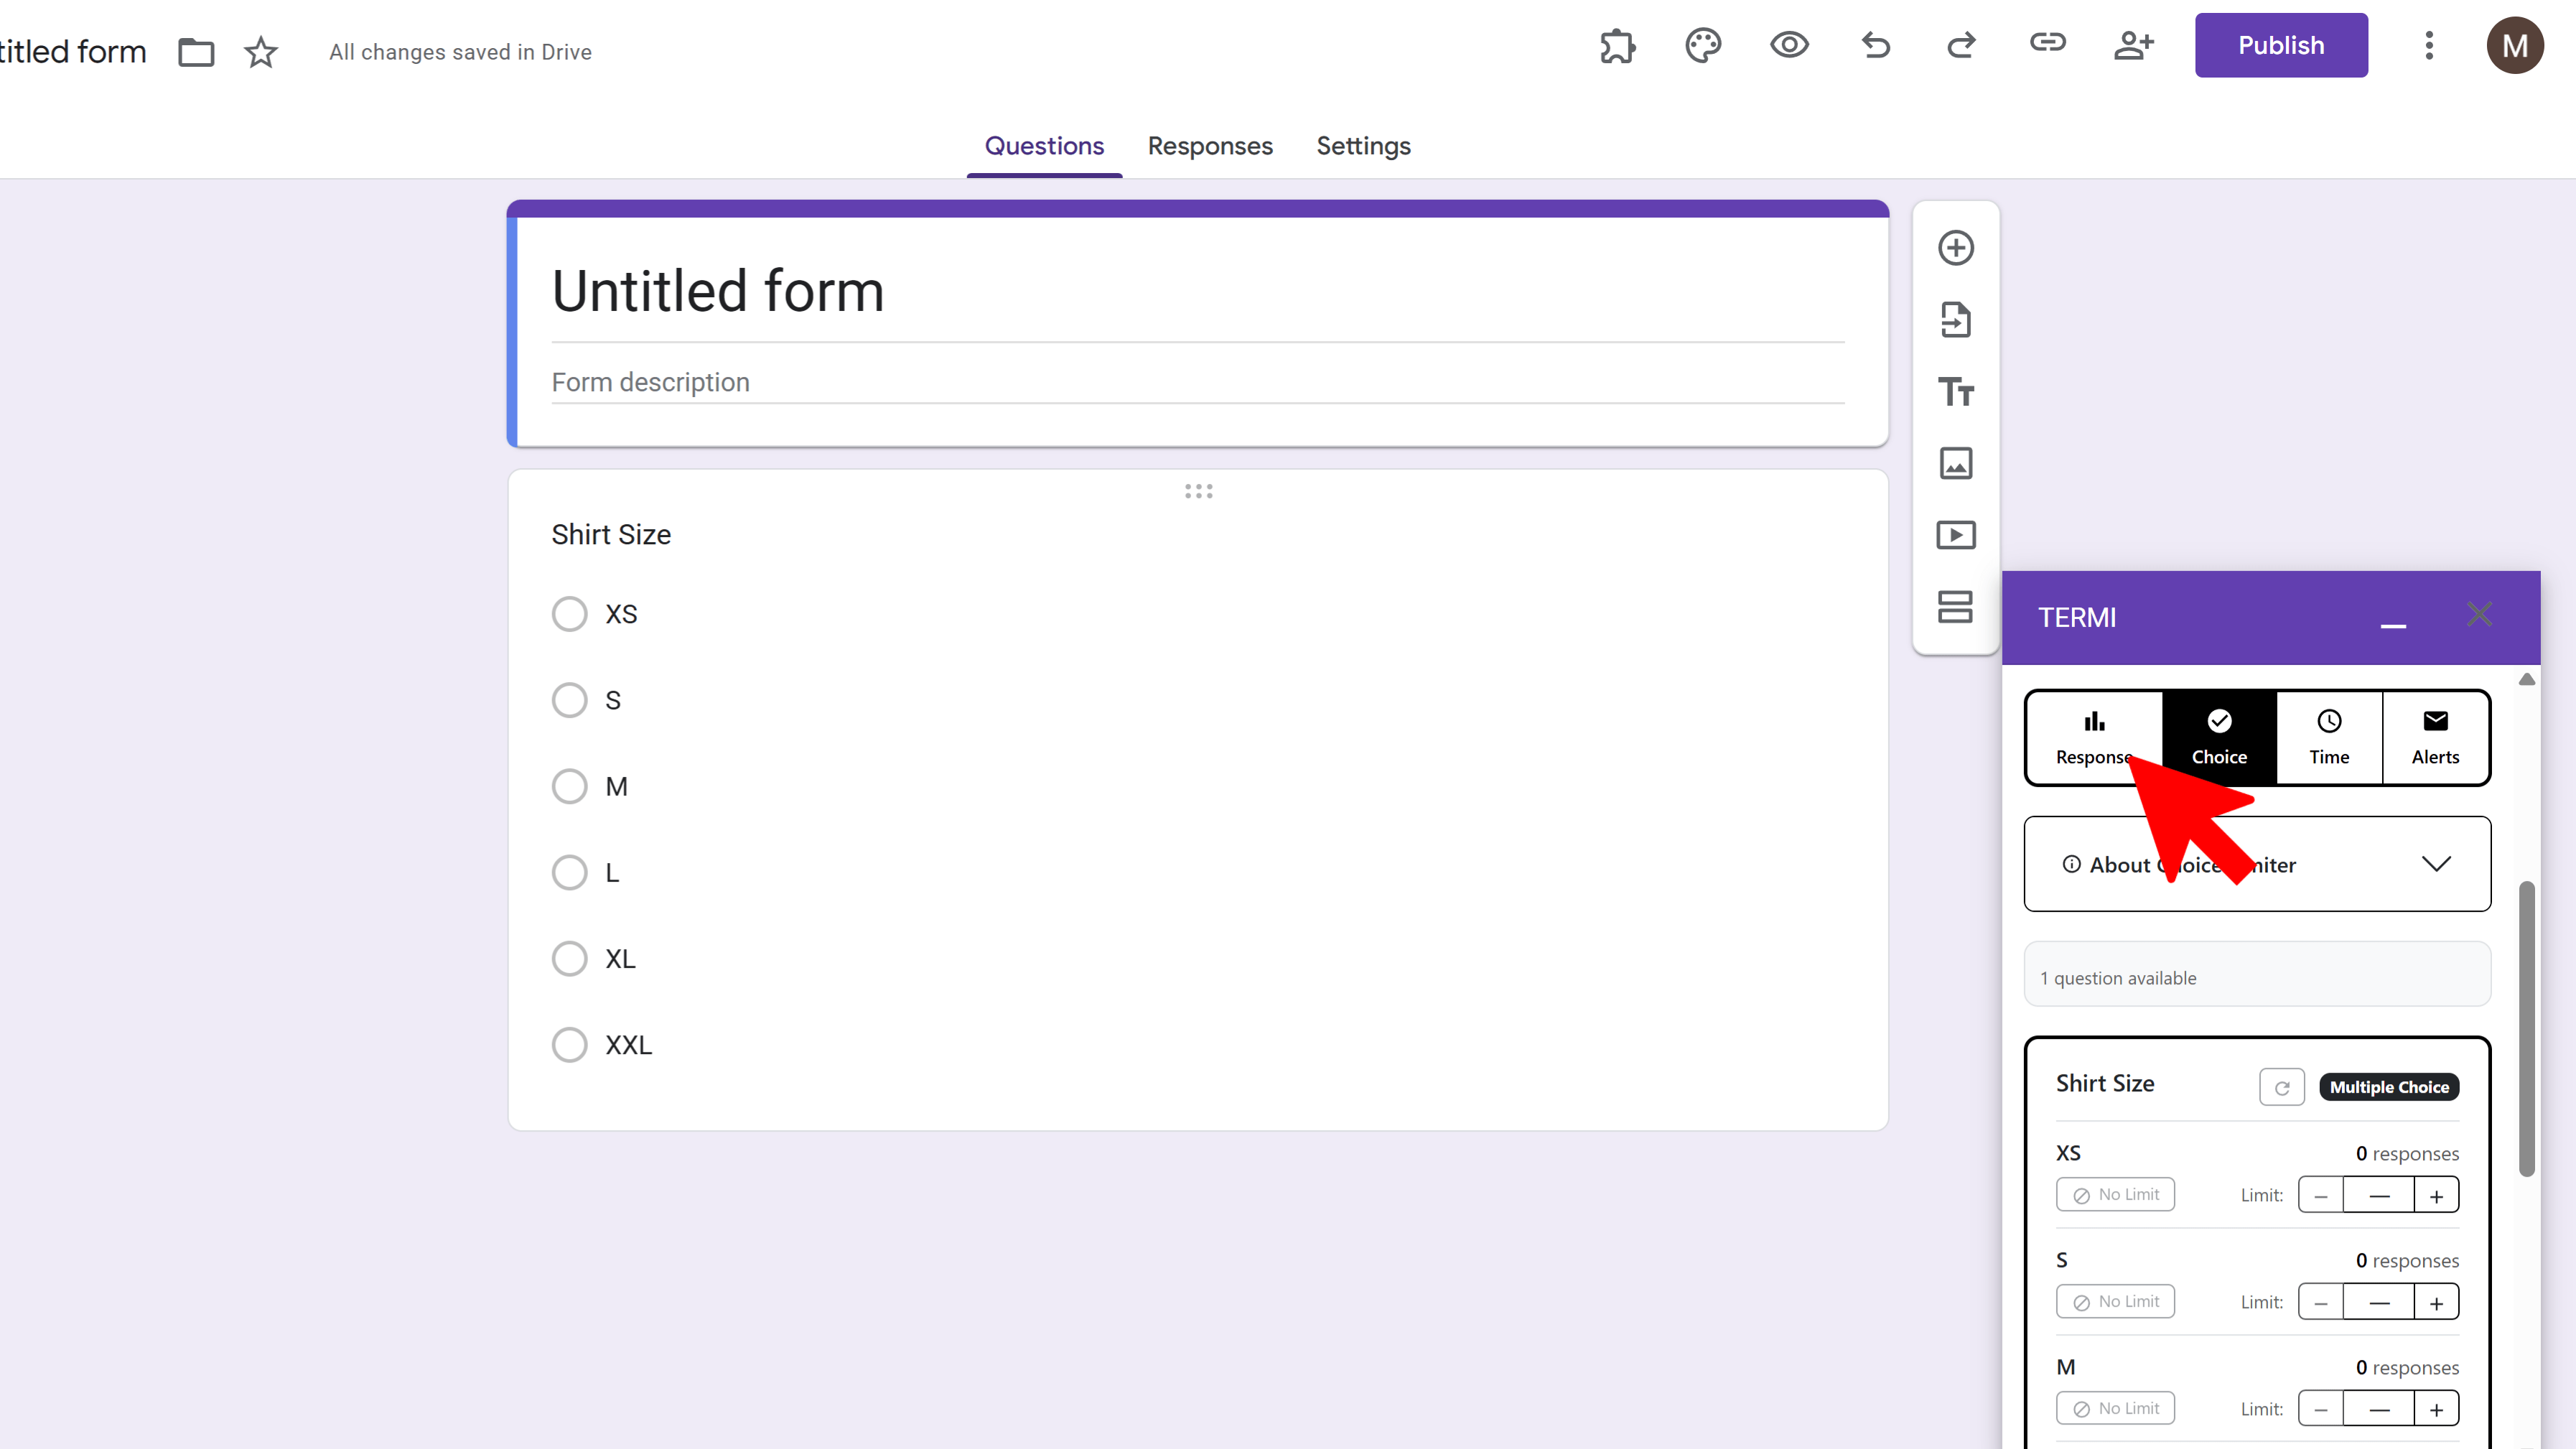
Termi is a Google Forms add-on that acts as a form limiter and choice eliminator . Open your Google Form, go to Extensions → Termi to launch it in the sidebar, then choose from four automated features:
Once Termi is open you will see its four main features on the home screen:
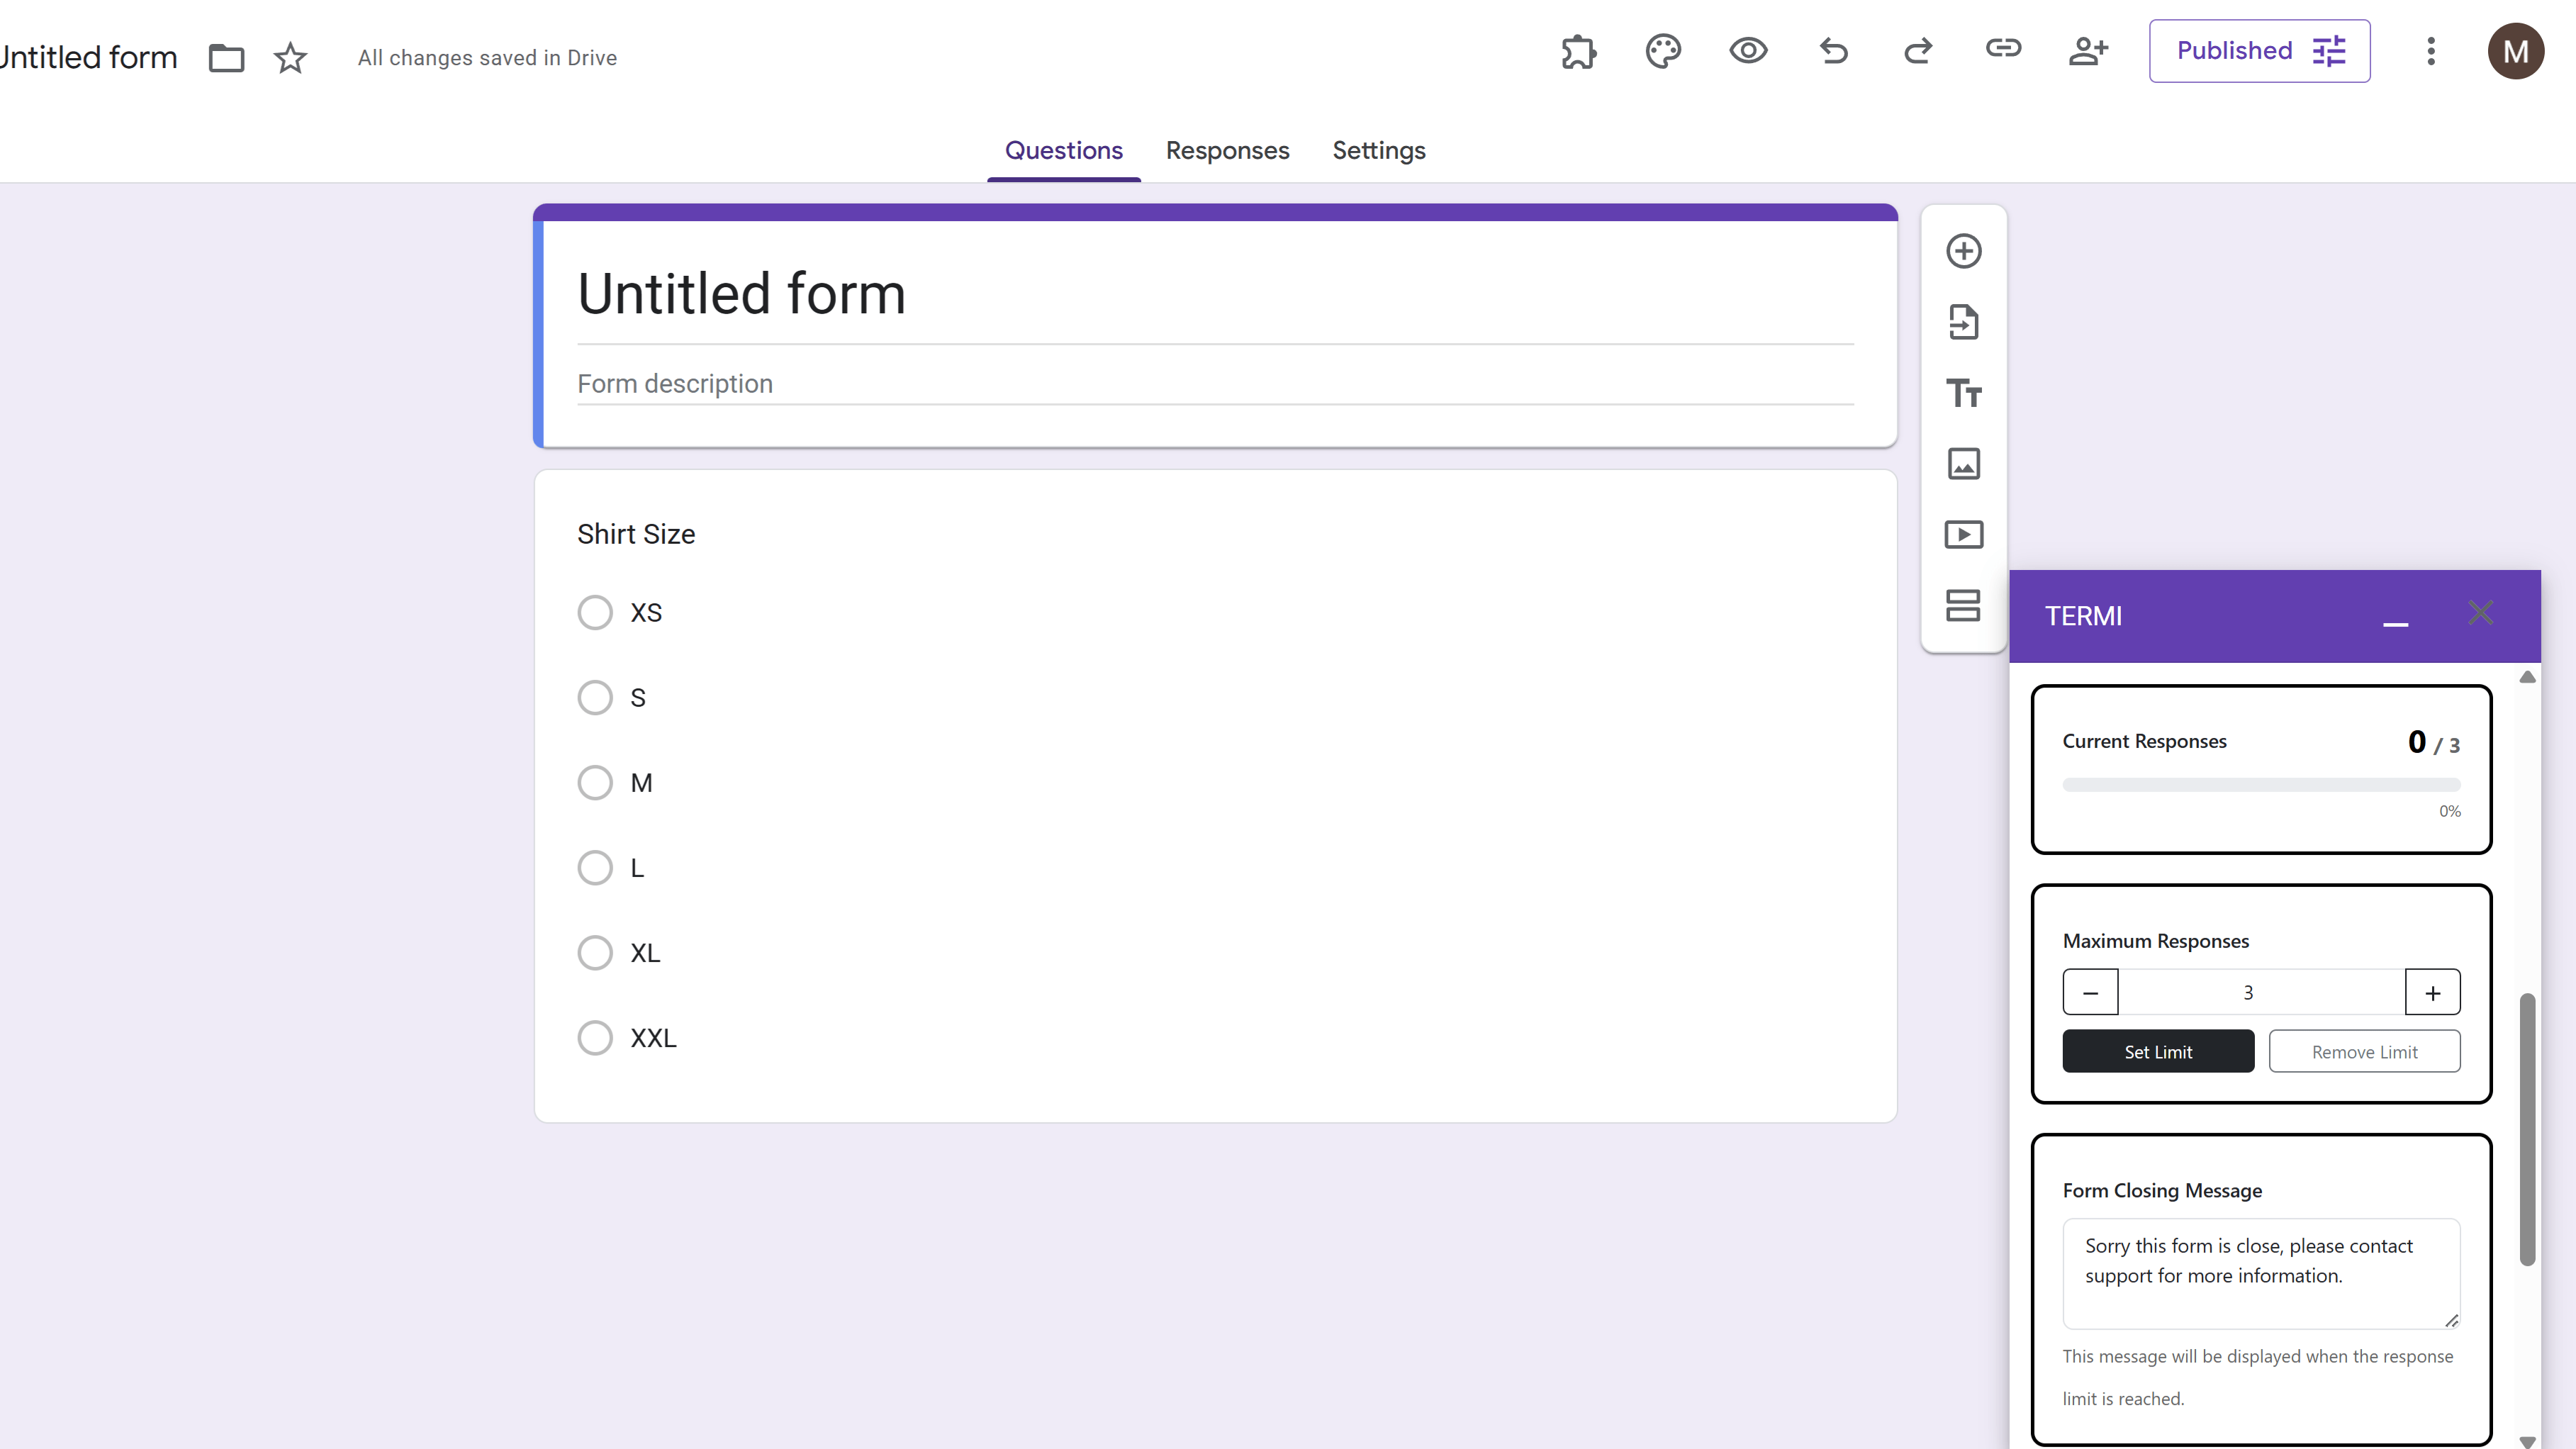
- Response Limiter: Set a maximum number of total submissions. When that number is reached, Termi closes the form instantly and shows your custom closing message, perfect for event registrations , limited-seat workshops, or first-come-first-served signups.
- Choice Limiter (Choice Eliminator): Set individual quotas per answer option. When a choice reaches its limit it is automatically removed from the form, preventing overbooking of time slots, sessions, meal preferences, or any limited resource. Works with multiple choice, checkboxes, dropdowns, and grid questions.
- Scheduler: Set a specific date and time for the form to open or close automatically. Note that you can only have one active schedule at a time, either an opening schedule or a closing schedule. Ideal for application deadlines, registration windows, or business hours availability.
- Email Alerts: Get notified the moment your form closes, a response limit is reached, a choice quota fills up, or a scheduled event fires. Alerts can be sent to multiple email addresses and include the form title, what triggered the alert, and a quick edit link.
For a full walkthrough of every feature, see the complete Termi guide .
Try Free
Termi: Form Limiter
Automate Google Forms with response limits, choice quotas, and time-based scheduling. Perfect for event registrations and resource bookings.
- Automatic response count limits
- Choice-based quotas (choice eliminator)
- Time-based form scheduling
- Email alerts and notifications
- Real-time progress tracking
- Built right into Google Forms